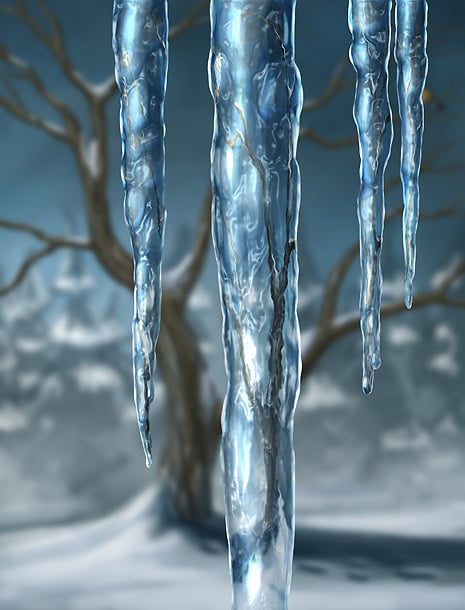
Painting icicles
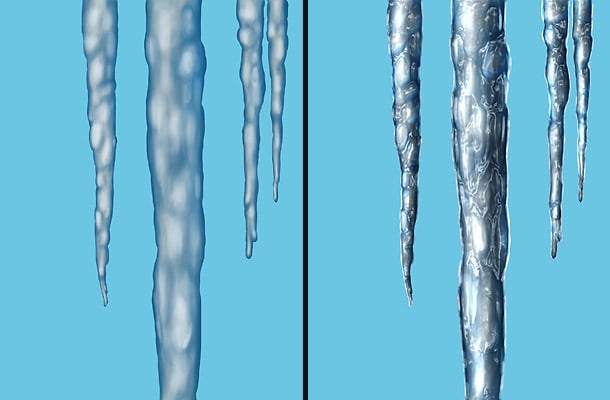
Step 1 – Get the basic shape up
Paint the icicles in a separate layer, and start out getting the main shape up with a nice silhouette and bumpy surface. Feel free to add some filter overlays if you want to save some time, like “Plastic wrap” or anything that gives the surface a more interesting look. Adding a strong highlighted silhouette around the edges of the icicles will make it look more realistic.
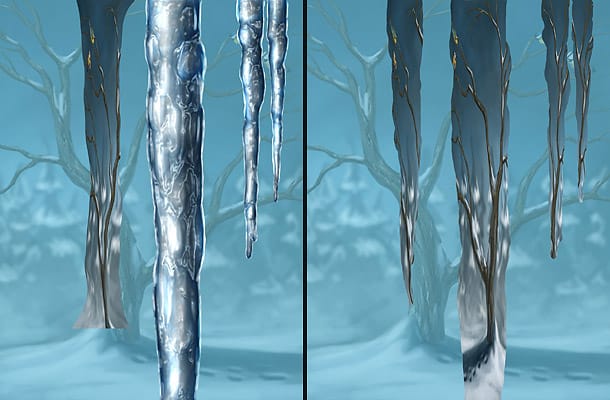
Step 2 – Refraction
Fill a clear glass with water and see what happens to the picture you see through it; it gets all mirrored horizontally. If you empty the glass, the image is back to normal, and you only have some minor distortion where the glass bends. Ice is solid, just like a full glass of water.
You can achieve a realistic impression of clear ice interacting with the background environment by copying the background you see through the ice into a new layer, flipping it horizontally, and then distorting it to fit each shape of the icicles by using the “Liquify” filter. Lastly crop the refraction image to fit the shapes in the icicle layer perfectly.
Step 3 – Final adjustments
Set the layer with the refraction graphics to “Lighten” blending mode, and layer opacity to around 60%, If it’s still lacking refraction details in the brighter spots of the icicle, make another copy of the refraction layer and set it to “Hard light” blending style, and 50% opacity. Then, go over everything and add some clear highlights here and there where it would make sense for the sun to bounce off. Contrast is the key when painting metal, glass, or clear ice.