20 fantasy art tips
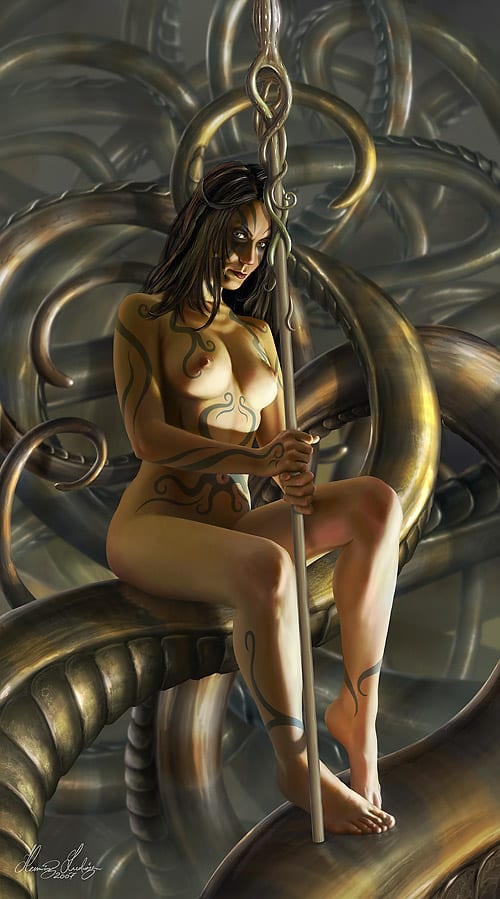
1 – Fantasy skin
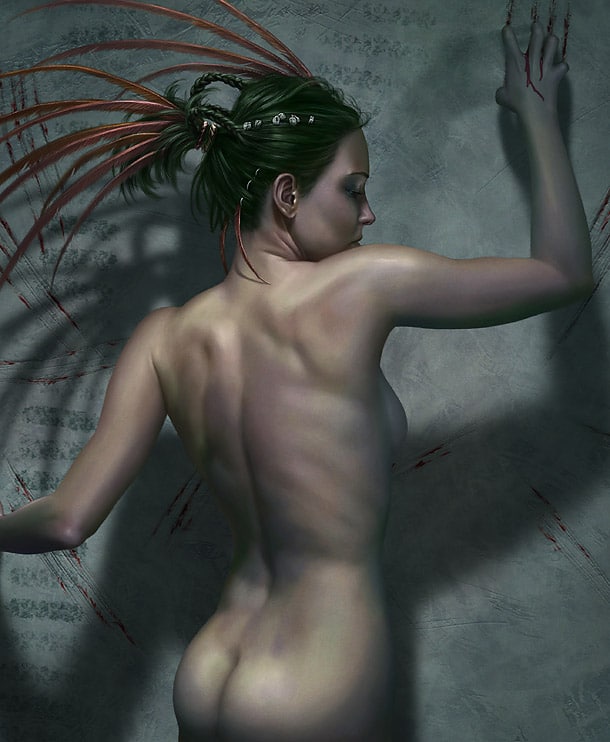
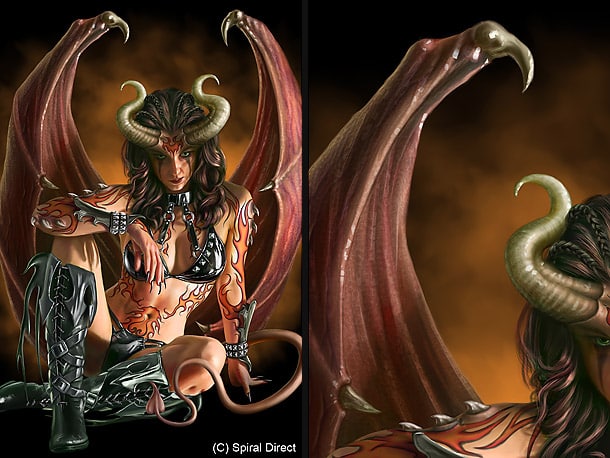
Skin is an extensive subject that can be great fun to study. When painting skin for a fantasy-related piece, you can stretch the rules further than if you were creating for a more traditional genre. Monochromatic skin tones is a good start, but by capturing all the different levels of colours and different skin types, and then experiment with this, you can still end up with a monochromatic expression even though the skin tones used contains all kinds of different colours. Skin is always darker than you think, so don’t take the highlights too far, and figure out where the skin is warm and use redder colours. Use colder colours where the skin is thin or paler.
2 – Three elementary things to avoid
- Unless you can hide it for sure, avoid using filters. There’s nothing less “painterly” than seeing a large surface covered in a custom made Photoshop filter effect. Why not use this effect as a vague base instead and work it over from there? The more handcrafted your piece is, the more you and your audience will appreciate it.
- Artificial effects like lens flares and software generated fire- and cloud effects are also something to re-consider as it will never look natural unless it has been done by hand.
- Avoid using the smudge tool for the major parts of the painting process. Keep your brush strokes clear, confident and bold.
3 – How to make traditional Frazetta kind of palettes
Using such an indefinite tool as the computer, you have easy access to all sorts of tools, and more colours than you can imagine. There are wide ranges of the available computer colour-palette that can only exist on your computer screen, so keep this in mind when creating your palette. When legendary artists like for example Frank Frazetta chooses their colours, they try to keep all their colours related. Even skin colours are mixed with colours from the surroundings. Limit your range of colours, and play more with narrower selections of the palette. Still, make sure to keep your chosen colours varied enough to not look monochromatic. You don’t need all the colours in the world to make your palette lush and rich.
4 – Rocks
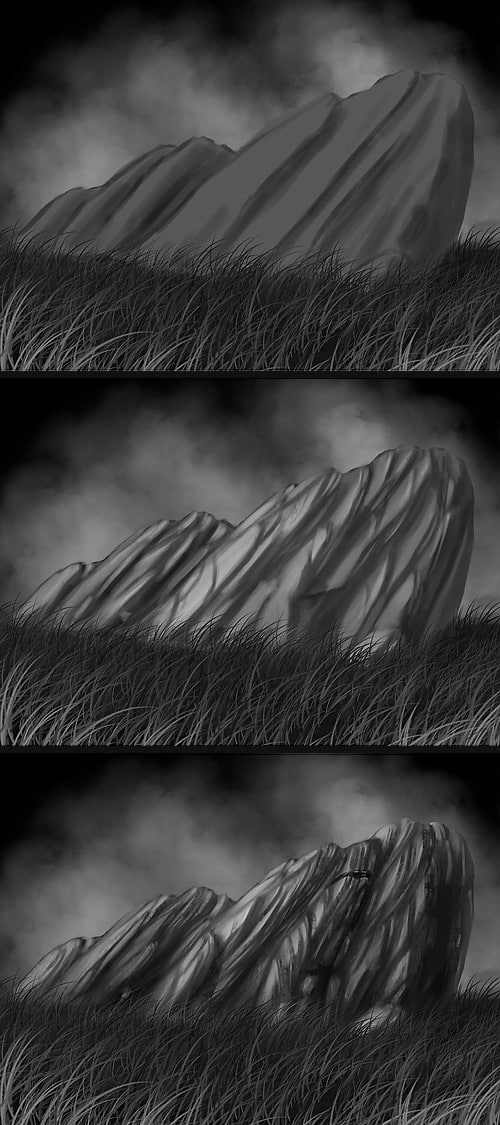
A repeating ingredient in fantasy related art is rock. It’s easy to go overboard and take the highlights and shadows too far which gives it a plastic kind of appearance. Also, making it too smooth and blurry is a common issue. A valuable pointer is keeping the highlights duller than you think. Contrast is still important, but you can still achieve this effect with colours that are close to each other contrast-wise. Narrow down the range of values but try to keep the lit faces more or less within the same areas of the palette. The same goes for the shadowed areas. A hard edged brush is the best tool for this. Stay true to your light source set up, and add veins and textures where it feels natural.
5 – Moody fantasy sky
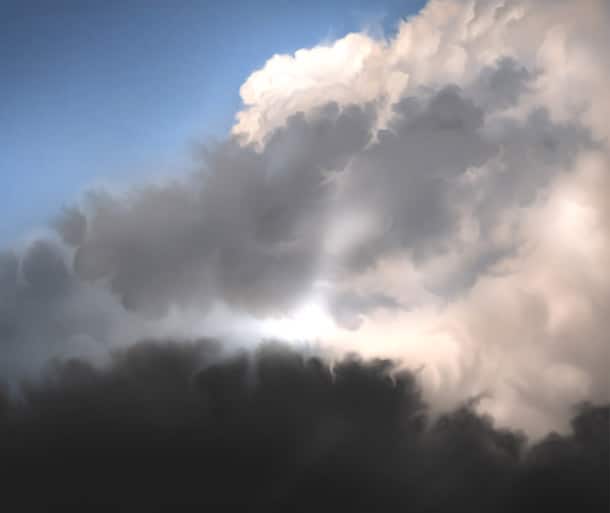
Fantasy art tends to have powerful expressions, stretching normal everyday elements further than usual. The same thing goes for clouds. Still, looking at real references and pushing this a few steps further whilst painting and you’ll find yourself in fantasy land. Contrast is important, so make sure to have some dramatic shifts of values and colours, along with beautiful and maybe even unnatural shapes and formations. Painting clouds can be very time-consuming, but as it is a very important part of the fantasy-genre, in the end it’s time well spent and will make your piece come together. Making some handy custom made cloud brushes will save you time.
6 – Visible brush strokes

A way to achieve a more traditionally painted effect is by creating a grey-scaled overlay texture that includes a vague canvas texture and brush strokes. Play around with some palette-knife brushes and add dynamic looking crisscrossed brush-strokes. Make sure the basic starting value for the background is close to the middle range: RGB=128, 128, 128.
If you apply a light emboss layer-style to your brush-strokes (Photoshop CS), you can get a vague 3D embossed look to the textured base. Now, set the layer blending mode to “Overlay” and adjust the opacity slider until you’re satisfied.
7 – Lay-out
“Less is more” when it comes to lay-outing fantasy art. Pick a simple idea and focus on this object in a bold and straightforward, confident way. Heavy focus on symmetry can often be a good solution for a successful fantasy art work, and making sure it balances well if you go for less symmetry and more elements.
The interesting thing with the fantasy genre is that both relying on heavy posing of your characters and more dynamic expressions might work equally well.
8 – Apply noise
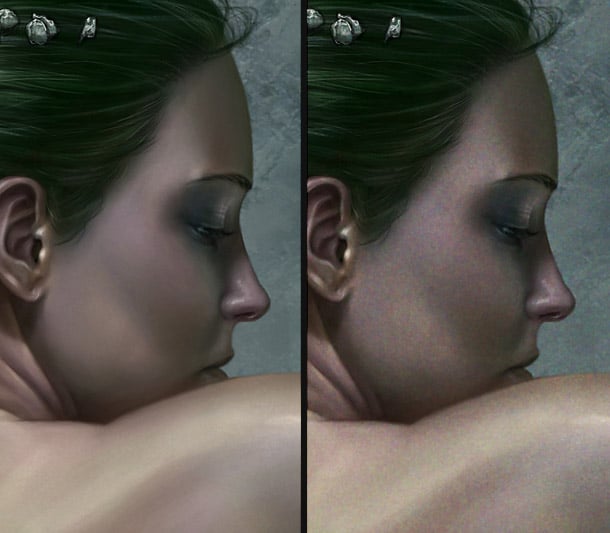
If you are aiming for traditional realism, the digital medium can often make your surfaces too smooth and perfect. By applying a noise layer to your painting at the end of the creation process, you will achieve more natural colour values. This works especially well on skin-tones.
- Make a new layer on top, RGB=128, 128, 128
- Run “Filter/Noise/Add noise” and pull the slider to 400%
- Run “Filter/Brush strokes/Spatter”
- Run “Filter/Blur/Blur” a couple of times.
- Set the layer blending mode to “Overlay” and opacity somewhere between 3% and 10%.
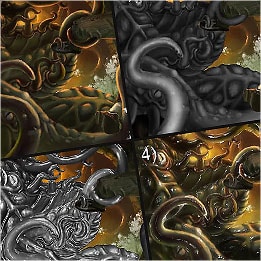
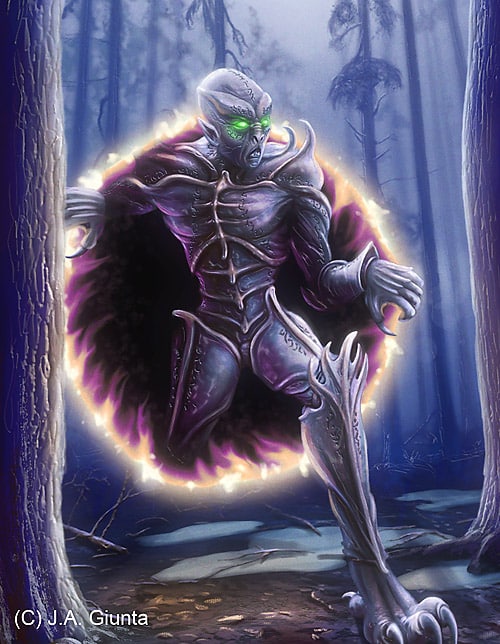
9 – Slimy tentacles
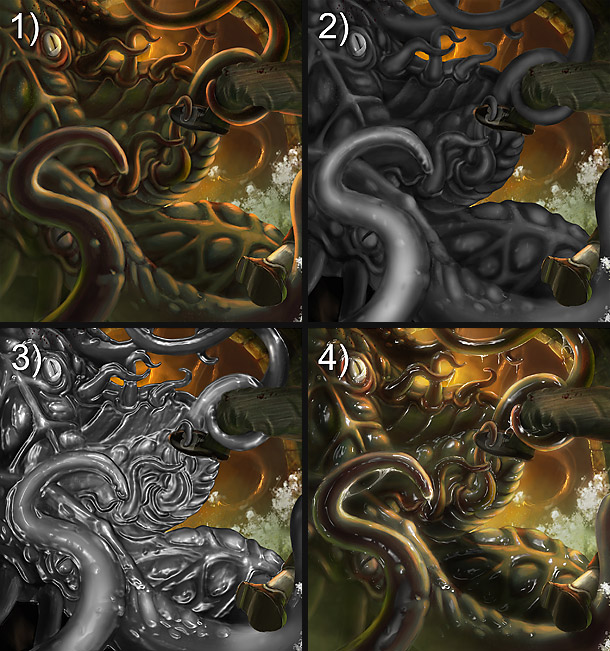
Fantasy art requires monsters, and often slimy, shiny, disgusting ones. The best way is naturally to paint everything from scratch, but if you want a quick result as a base, follow these points:
- Having a decent monster ready, copy the areas you want to create slimy into a new layer.
- Make the copied layer into grey-scale, and smoothen it out with a soft brush. The shape pointing towards you should be brighter, and the ones pointing away from you should be darker. Ignore light sources. Bright will extrude, dark will etch.
- Run the layer through Filter/Artistic/Plastic Wrap. Keep the details to a minimum.
- Set “Layer blending mode” to “Pin light”. Use Dodge tool (Highlights) to force-edit more/less highlights from the “Pin light” layer, and paint some strings of slime if the urge is there.
10 – Textured brushes

What gives a piece of art character and traditional appearance is human imperfection. It’s too easy to give into soft brushes, masking, and over-detailing on the computer. When working digitally, custom made brushes can help you emulate this imperfection. Download or make yourself some textured brushes; something that will give your pieces imperfect lines and surfaces with character. A simple line can contain a lot of details if the brush is right. Also, if you catch yourself fiddling about in the same place time after time, move on to other areas before over-detailing unevenly.
11 – Mountains
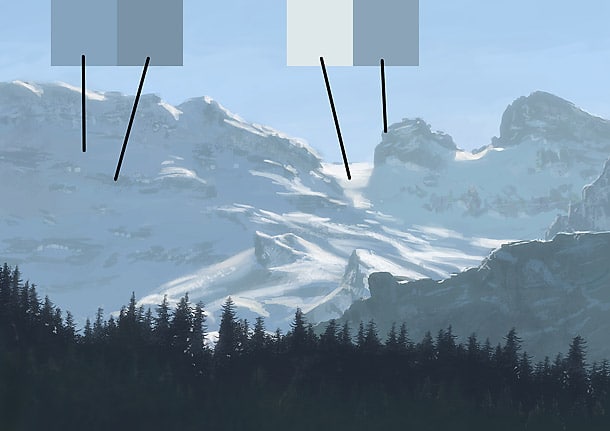
What would fantasy art be without mountains? Remember that even though you might be painting a landscape for an over-exaggerated fantasy piece, looking at pictures of real mountains will aid you to make them appear realistic. A good tip is to limit your range of values. Make one value each for highlighted rock and snow, and the same for shadowed versions of the two. Some variations should naturally occur, but keeping the values limited and rely on sharp detailing with a hard edged brush will make your mountains look more natural. Painting with too much smooth transition can make your mountains appear unnatural.
12 – Manual glow
There are plenty of ways to apply automatic glow onto objects in the different painting packages out there; from soft brushes, to layer styles. To make your artwork appear as PAINTED as possible, go for hard edged brushes and paint it by hand instead. A glow doesn’t have to be perfectly smooth, but it will still do its purpose and at the same time add more of your own personality to your piece.
13 – Fantasy glow
The romantic and the fantasy genre is where global glow effects have been used most consistently. This effect is a two sided blade; it can push your piece one level up and add the extra environmental attribute needed, or it can tear it apart and leave you in the 1980’s if used too hard.
Add a flattened copy of your piece onto a new layer on top of all the other layers (Ctrl+Alt+Shift+E). Run this layer through “Filter/Guassian blur” (make it blurry so that all details turns into a blurred mass), and play around with the “Linear dodge” blending mode and opacity slider on the layers dialogue. It’s a nice thing to add at the end of the creation process.
14 – Canvas prints
What makes a painting more traditional than a piece of art on canvas mounted onto a wooden frame? Make your digital fantasy pieces come to life by printing them on real canvas and hang them on the wall. There are many companies that can offer these services today. The texture of the canvas makes it look and feel like a real painting, and it even smells similar.
15 – Reflective metal the easy way
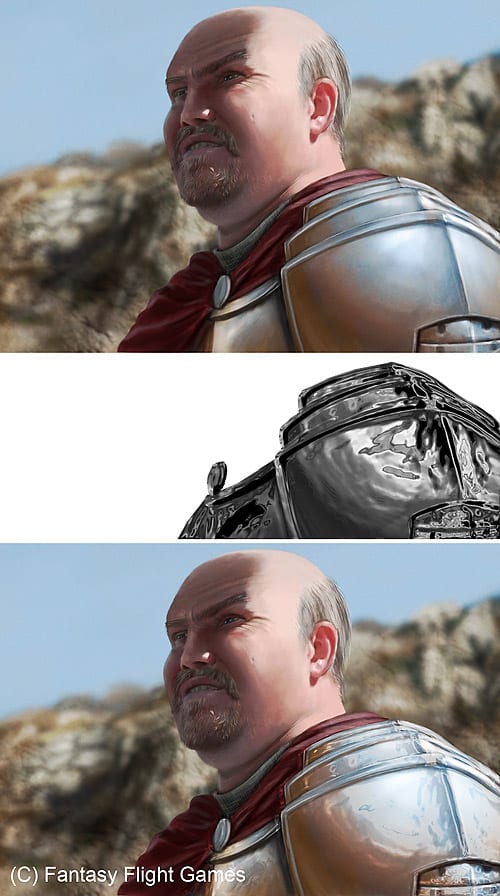
There’s nothing like painting metal completely manually, but if you need some help getting started, there are faster ways of creating decent bases for shiny, metallic effects:
- Copy the metal shapes into a new layer.
- Turn the saturation down to grey-scale.
- Smoothen out the surfaces using a soft brush. Surfaces facing you should be bright, and surfaces facing away from you should be dark. Ignore light sources.
- Apply some darker lines of sunken/etched details, and brighter for “extruded” details.
- Run the layer though “Filter/Chrome”. Keep details low.
- Set the layer blending mode to “Colour dodge” and play around with the opacity.
16 – Mist between the valleys

Even simple backgrounds can become beautiful and life-like by adding simple elements to them. Make sure you divide the background into separate layers depending on distance. Applying a soft fantasy-looking mist at the bottom, in between each valley, can create an eerie feeling, and add a lot of depth to the piece by simple means, even if the trees in this example are plain, flat silhouettes. A cloud brush works perfect, but a soft round brush does the purpose as well.
17 – Form-fitted textures
When using textured layers with digital art, it can be easy to forget that objects are supposed to have actual shape, and the overlay textures might look projected straight onto the objects. A simple solution is to make the noise layer cover more than you actual need, and take advantage of the “Liquify” tool in Photoshop CS.
With the dialogue open, use the “Forward Warp tool”, tick the “Show backdrop” box, select the base object from the “Use” drop-down, set “mode” to “Behind”, and adjust the “Opacity” so that you can see through the texture layer. Now, use large brushes and Warp-change the texture layer so that it follows the shapes of the object. Once you’re done, delete the textures that are outside the boundaries of the base object.
18 – Check your grey-scale values
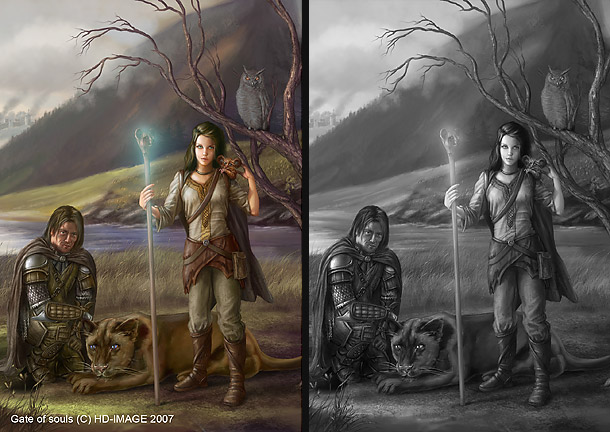
Fantasy art usually contains dramatic colours and contrast. A good piece of fantasy art should also work in grey-scale, so check your grey-scale values every now and then and get a handy overview of how your piece is doing. A quick way of checking this is keeping a layer on top of your layer-stack with 100% white colour and blending mode set to “color”. Turn the layer on/off to toggle between colour and grey-scale mode.
19 – Distribute your details
It’s easy to either go overboard with details, or doing the brush-strokes too rough and simple. Try to distribute your detailing throughout the piece onto areas that is important and will catch the eye. Remember that even rough brush strokes can act complex if accompanied with detailed areas. Look at the high-lights on the example, when looking at the piece from a normal distance or at a normal size, it adds shape and detail.
20 – Limit your highlights
An important overall tip to realistic results in realistic-looking fantasy art is to avoid extreme high lights, especially on fabrics folds and skin folds. Too strong high lights on skin might result in an artificial appearance and a comic book style to the characters. Keep your grey-scale base values under control.