
Painting glow-effects
Adding details like glowing effects can be a lot of fun, and the end result can add a lot to your piece. The effect we’ll be doing here can be added to everything from cool looking logos, text, or for effects in your paintings. Remember that overdoing this effect can make your composition confusing and hard to read, so make sure to take your time and place your glowing details carefully and not too scattered throughout your piece.
This effect is quite simple to do, and can be achieved quite quickly and is easy to adjust as it’s added in separate layers.
One important thing to keep in mind when wanting to add glowing elements to your art, is to remember that high contrast is the key to achieve the right effect. Having glowing elements on a bright surface probably won’t work as well as if the surface is darker. For this example, I wanted to paint a fire elemental girl of some sort, and decided to keep her skin fairly dark to get the glowing bits more exaggerated. The soft glow around the cracks makes it all seem more intense and adds realism and atmosphere to the piece. Always use strongly saturated warm colours for fire and glow-effects like this.
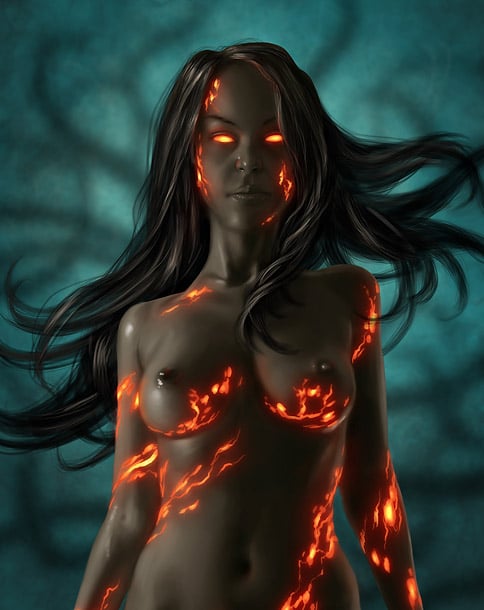
It’s quite easy to add glowing details to your characters or graphical elements, and the effect can be very strong act as an attention seeker. Use contrast to achieve the best result.
Spend time on the design of the glowing parts, as this will be the base for several other layers later in the creation process. Can be added to any old painting you’ve got laying around.
3-step walkthrough
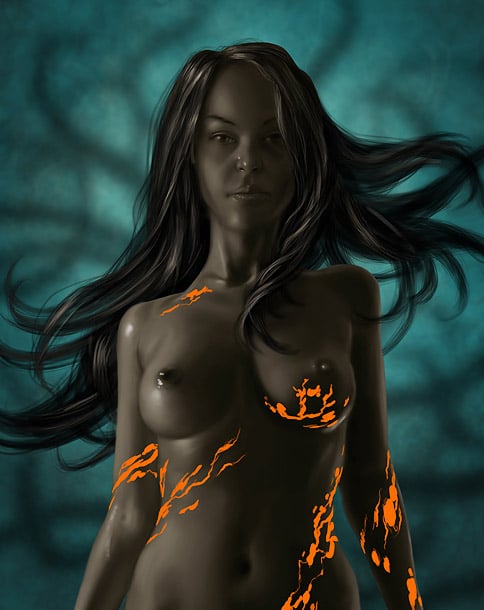
Step 1 – Define the glowing parts
Add a new layer and paint cracks and spots that you want to add the glowing effect to. Use a strong saturated orange colour. Make sure to use a hard brush to keep your details as sharp as possible. Then add some variation in intensity using the “dodge tool” set to “highlights” mode. You can of course “lock the transparent pixels” and use a normal painting brush set to “Linear Dodge (Add)” for even more effect. Each brush stroke will burn the previous stroke, creating a nice and intense effect.
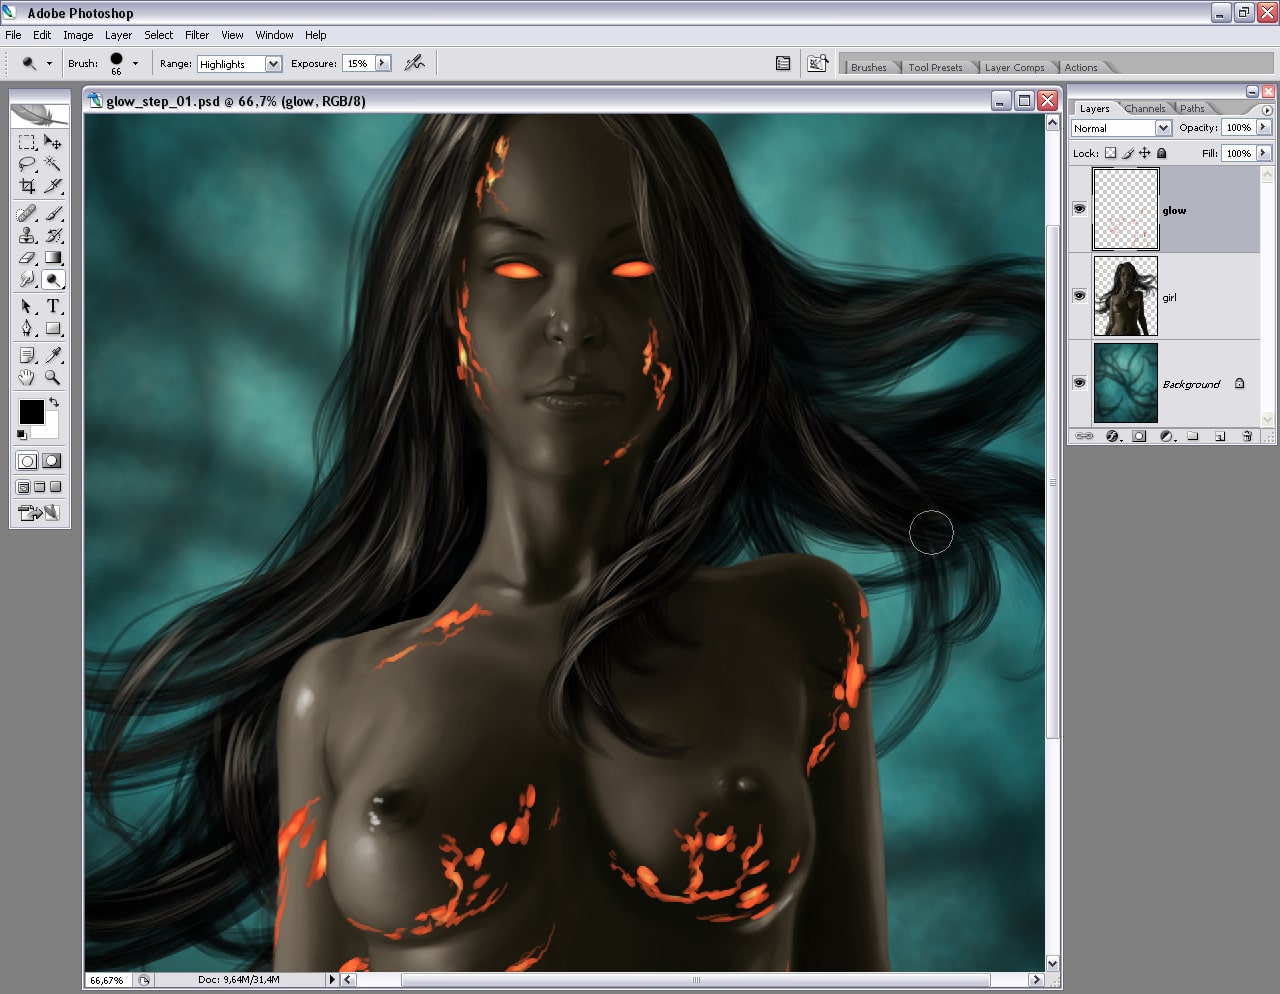
Step 2 – Add surface glow
To make the surfaces around the glowing cracks glow vaguely, add a copy of the layer with the cracks and place it behind. Adjust the colour of the cracks in this layer into a deeper orange, almost red and run it through a “guassian blur” filter set to a fairly high value. Add an orange outline to the cracks before adding the blur if you’re looking for a stronger glow. Set the layer blending mode to “hard light” and play around with the layer opacity slider. You can also use the “glow” in the “layer style” set to the same blending effect. The latter works really well if you’re adding more cracks and would like the soft outer glow effect to be added automatically.
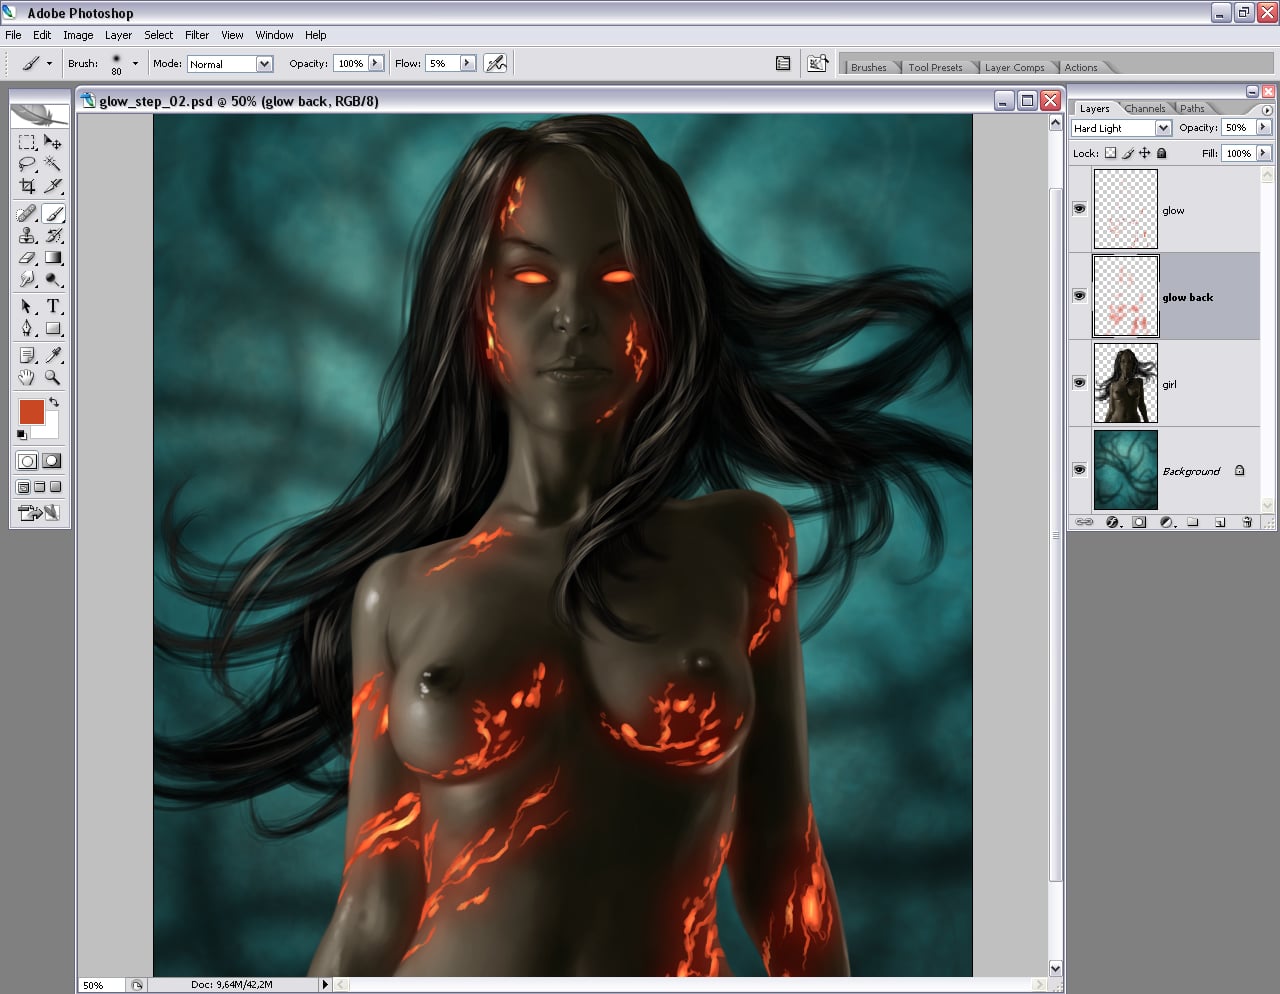
Step 3 – Add extra glow
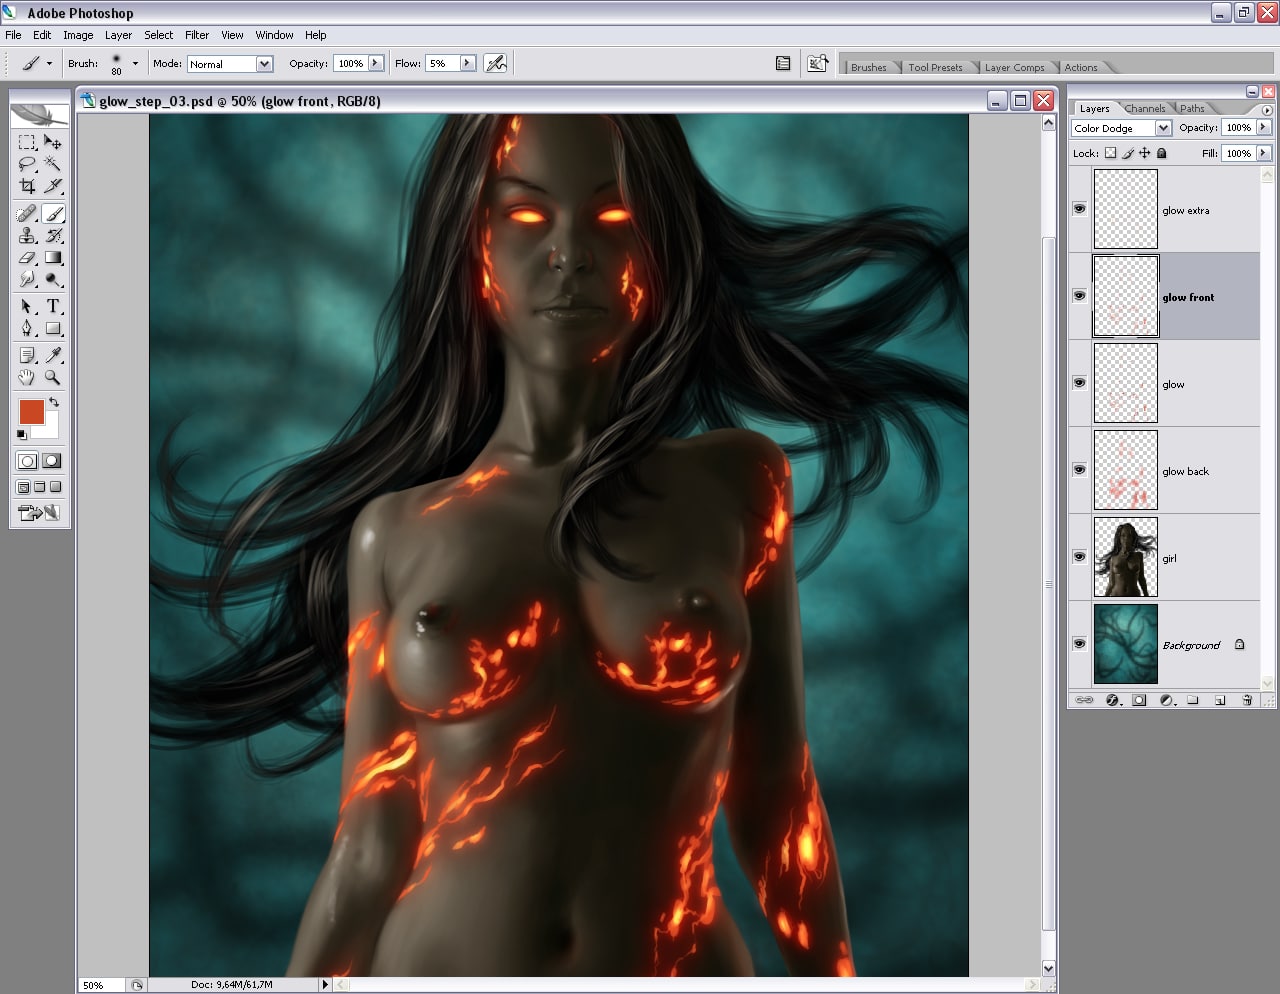
Again, add a copy of the layer with the glowing cracks, but this time place it at the top of the layer stack, add a smaller amount of “guassian blur” and set the layer blending style to “color dodge”. Paint on some glowing light bouncing off appropriate places, either in existing layers or in a new layer set to “hard light” layer blending mode.