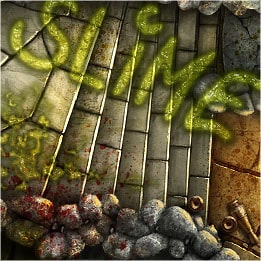
When working with fantasy-related art, you will probably sooner or later deal with painting slime and goo. If you’re planning on creating threads of classical dripping Ghostbusters kind of slime, the best thing is naturally to paint it all from scratch, as any layer styles or automated settings just won’t pull it off, and it will look odd.
For an easier approach, like more of a non-dripping kind of slime, you can use another technique to get you somewhere close. This technique can be used for all sorts of images, but it works best when viewed from the top (like here, for a table top game) as we’re going to take advantage of the layer style features of Photoshop.
A good thing with layer based effects is that you can custom paint everything to fit uniquely with a minimum of effort and opportunities for post adjustments. What gives the effect we’re looking for is the mix of hard highlights and semi-translucent matter.
It’s important to keep in mind that the settings and results will differ depending on the resolution of your image, so if your slime doesn’t turn out as planned, play around with the layer settings.
Step 1 – Set up Outer Glow, Layer Style
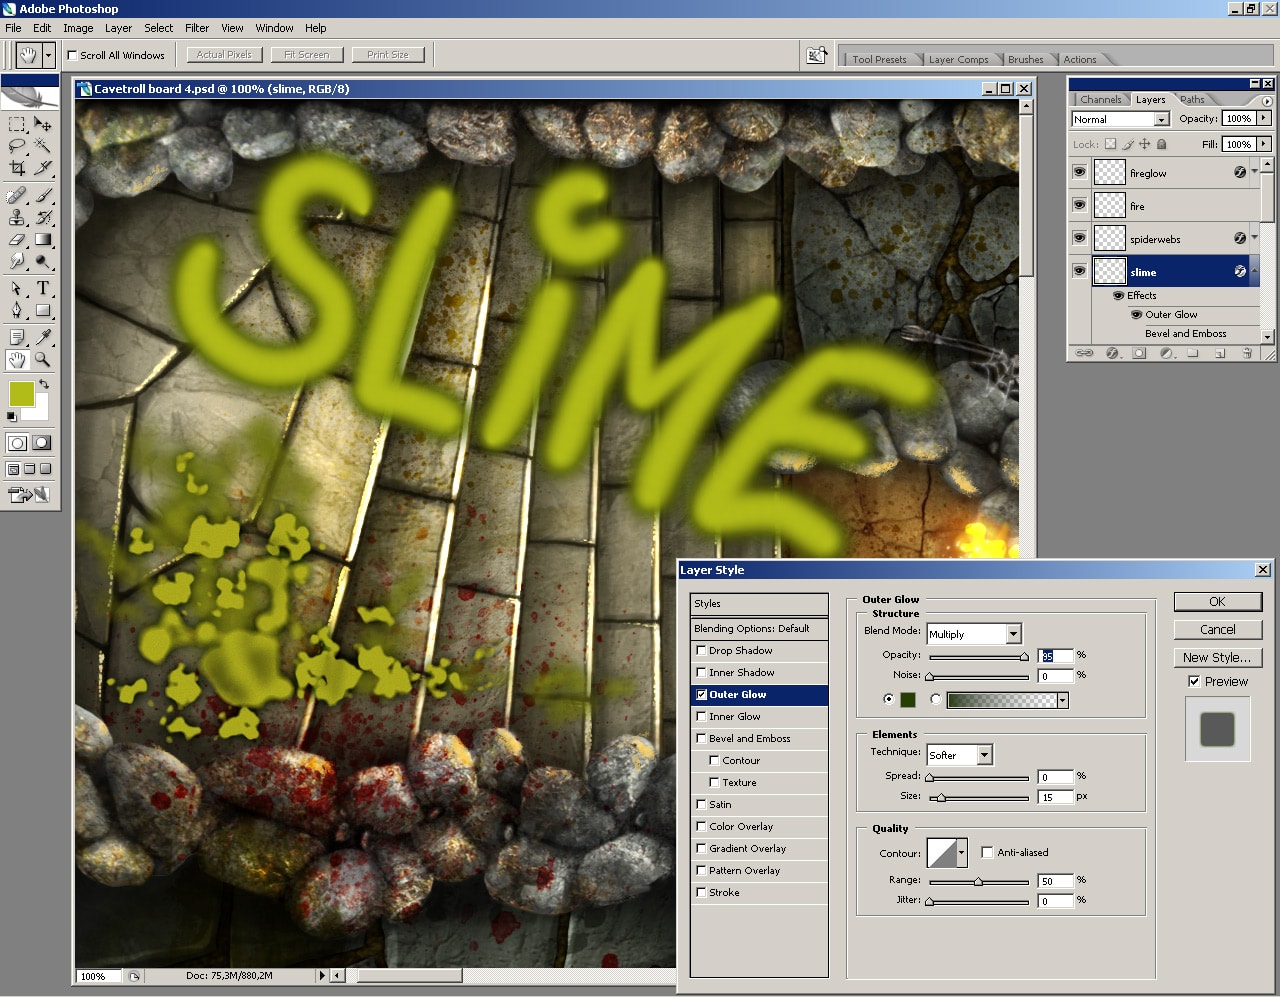
In a new layer, add a “Layer Style”, and enable “Outer Glow”. Set the “Blend Mode” drop down to “Multiply” and select a dark green colour. Set “Opacity” to around 95%. Set “Spread” to 0%, “Size” to 15%, “Range” to 50%, “Jitter” to 0%, and make sure the “contour” drop down is using the “Linear” selection.
Step 2 – Set up Bevel and Emboss, Layer Style

Enable “Bevel and Emboss”, and adjust the settings under “Structure as follows: “Style” to “Inner Bevel”, “Technique” to Smooth, “Depth” to 450%, “Direction” to up, “Size” to 10 px, “Soften” to 0 px.
Under “Shading”, set the light closely to the centre, use “Linear” Gloss Contour, set “Highlight Mode” up high, and make sure “Shadow Mode” is set to “Multiply”.
Set “Contour” to “Half Round”, and use the pre made “Clouds” pattern under the “Texture” style. Up the Scale, and play with Depth.
Step 3 – Start sliming stuff!
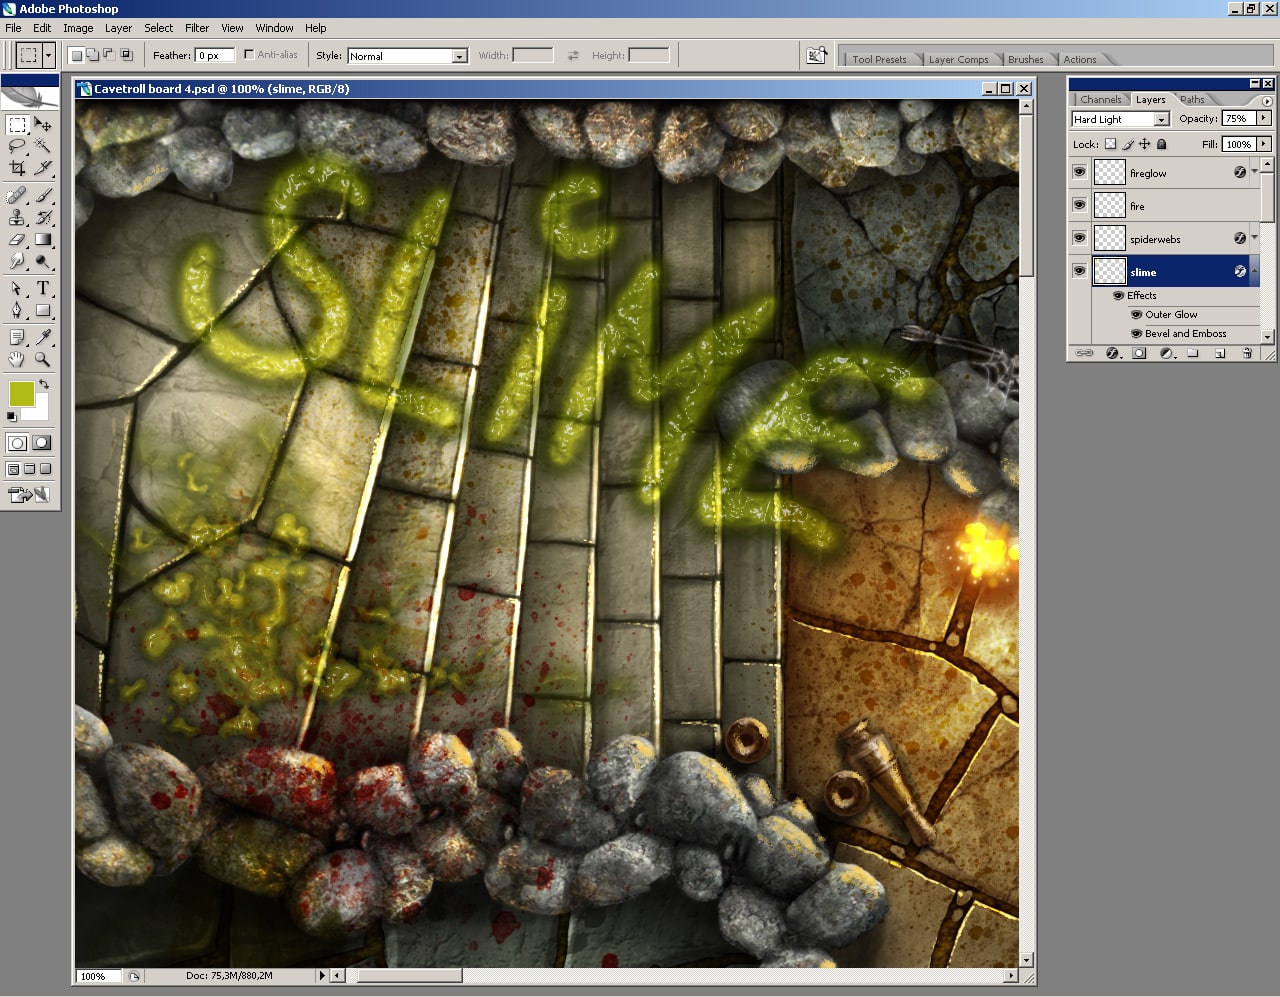
Set the Layer blending mode to “Hard Light”, and layer opacity to 70%, and start sliming your painting using your favourite green icky colour and the Brush Tool. Play around with hard and soft brushes, and see what suits you best. Play around with the Layer Style settings, and keep an extra eye on the light angle, as this feature decides how sharp the highlights get rendered.