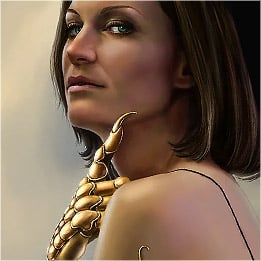
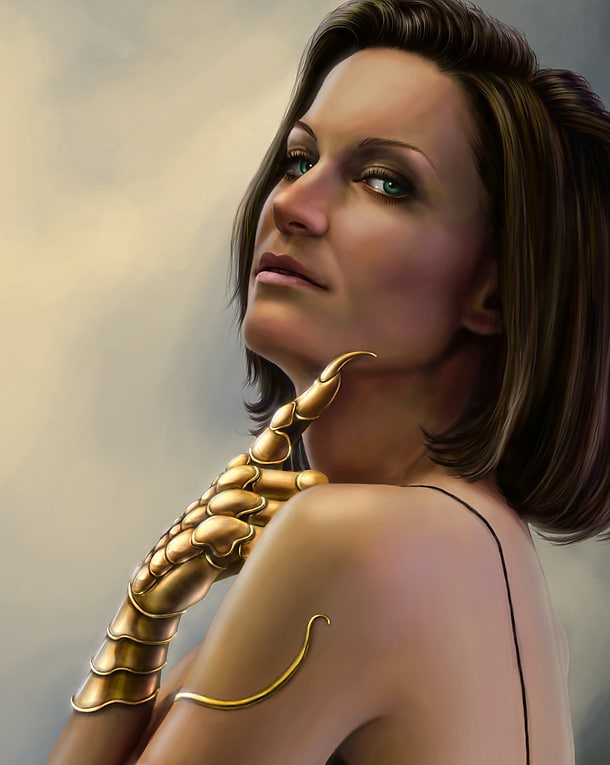
Painting gold
When working digitally there are plenty of shortcuts as how to make things look like metal, and I believe it’s a good thing to avoid using custom made filters and still try to find a simple solution on how to do this from scratch on your own.
Start off by outlining the object and add an in-between medium dark base colour so that you can easily add shadows and high lights out from this base.
The next step is defining and understanding the shapes, so that it’s easier to apply the real shadows, reflections, and highlights according to the direction of the light in the scene.
At the end, add reflections and shadows. Also, add a soft glow to the brightest highlighted spots with a large soft brush to make it look a bit more believable.
It’s common to make especially golden items look too monochromatic. If you look closely at a golden surface, you will see that the golden colour includes a lot of different values. Try to capture the colours, and carefully mix them all together. I suggest using hits of colours varying from yellow, green, grey, red and blue. If you have a surface with a different colour reflecting on the golden surface, this colour should be mixed into the reflected area, introducing more colours.
Simple 4-step walk-through
1 – Standard base
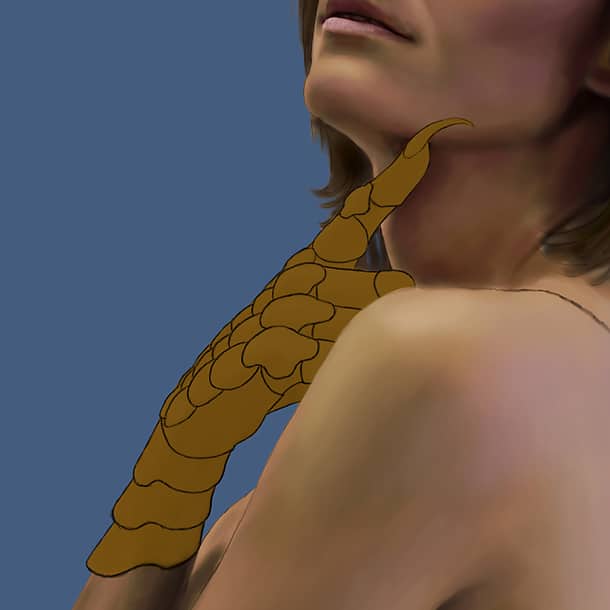
First, start with a basic outlined version of the element that you want to paint. Also, make sure the background is filled with a medium dark basic colour to make it easier for you to add shadows and highlights.
2 – Define shapes
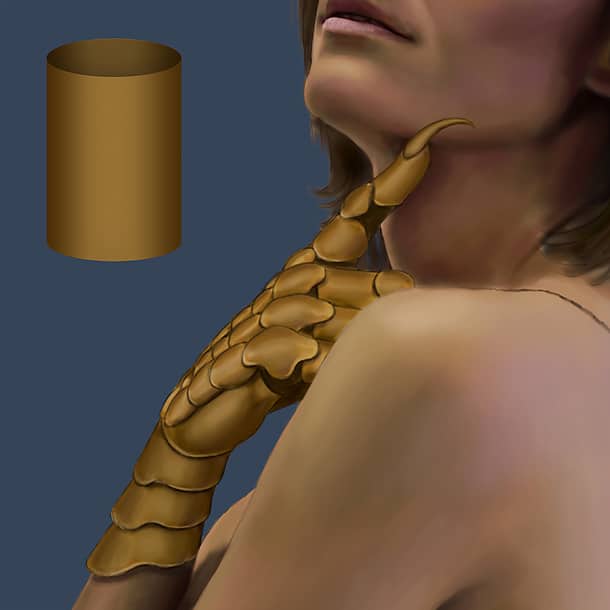
Now the fun starts. Use your favourite brush (I prefer a hard edged one), and carefully give shape to the different parts. The more a surface is facing you, the brighter it should be, and darker when facing away from you. See the smooth transition on the pipe-line illustrated here.
3 – Light source direction, and high lights
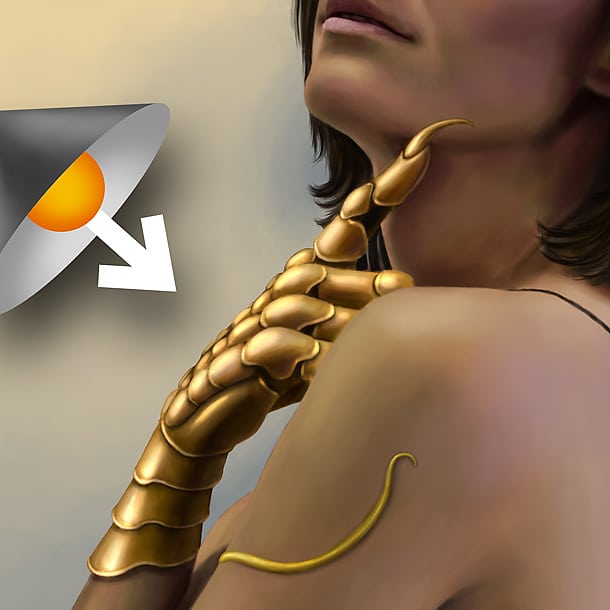
Map out where the light is coming from. The surfaces pointing towards the light source should be brighter, and the one facing away from the light should be darker. Use normal paint-brush when doing this. At the end, use the dodge tool and set the range to “Highlights” (exposure around 5%) to make the high lighted areas look metallic.
4 – Reflections and shadows
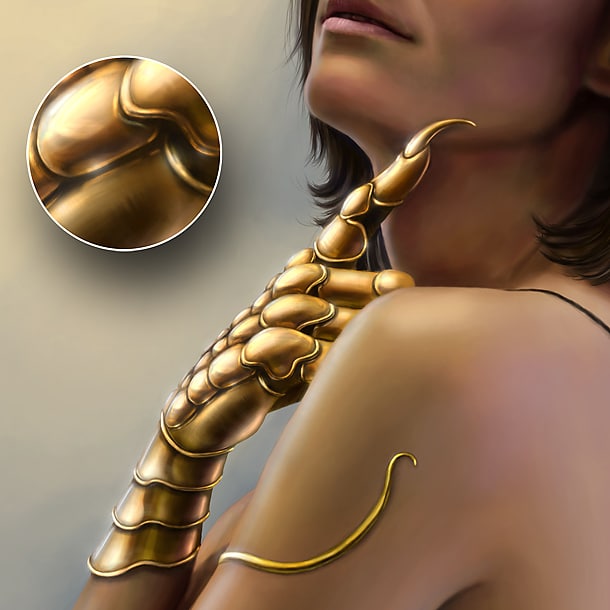
Understanding reflections takes some time and practice, but a simple way to emulate simple reflections, is to mirror highlights onto the reflecting surface. It doesn’t have to be 100% identical, just a hint that something is being reflected. See how the skin colour gets reflected on the right side of the gauntlet. Also add some shadows to help the shape. Tip: add a thin brighter outline at the negative side of a shape.